In this post, I’m sharing my experience to set up a C development environment on Windows. I’m installing GCC from the MSYS2 project and using Visual Studio Code as my IDE.
Install MSYS2
MSYS2 is a project which provides a collection of tools for building native Windows software. See this documentation for learning more about it. I have installed MSYS2 as explained on the installation page using the installer in the default location.
Installing Toolchain
After installing the base MSYS2 installation, I installed the toolchain for the MINGW64 environment. For that, I did the following steps:
-
Open “MSYS2 MSYS” from Start menu.
-
Run the following command:
$ pacman -S --needed base-devel mingw-w64-x86_64-toolchain
warning: file-5.39-2 is up to date -- skipping
[... more warnings ...]
:: There are 48 members in group base-devel:
:: Repository msys
   1) asciidoc  2) autoconf  3) autoconf2.13  4) autogen
   [... more packages listed ...]

Enter a selection (default=all):
:: There are 19 members in group mingw-w64-x86_64-toolchain:
:: Repository mingw64
   1) mingw-w64-x86_64-binutils  2) mingw-w64-x86_64-crt-git
   [... more packages listed ...]

Enter a selection (default=all):
resolving dependencies...
looking for conflicting packages...

Packages (123) docbook-xml-4.5-2  docbook-xsl-1.79.2-1
               [... more packages listed ...]
               m4-1.4.18-2  make-4.3-1  man-db-2.9.3-1
               mingw-w64-x86_64-binutils-2.35.1-3
               mingw-w64-x86_64-crt-git-9.0.0.6090.ad98746a-1
               mingw-w64-x86_64-gcc-10.2.0-6
               mingw-w64-x86_64-gcc-ada-10.2.0-6
               mingw-w64-x86_64-gcc-fortran-10.2.0-6
               mingw-w64-x86_64-gcc-libgfortran-10.2.0-6
               mingw-w64-x86_64-gcc-libs-10.2.0-6
               mingw-w64-x86_64-gcc-objc-10.2.0-6
               mingw-w64-x86_64-gdb-10.1-2
               mingw-w64-x86_64-gdb-multiarch-10.1-2
              [... more packages listed ...]

Total Download Size:    196.15 MiB
Total Installed Size:  1254.96 MiB

:: Proceed with installation? [Y/n]
[... downloading and installation continues ...]
Verifying Toolchain
-
Open “MSYS MinGW 64-bit” from start menu.
-
Verify that
gcc --versionworks.$ gcc --version gcc.exe (Rev10, Built by MSYS2 project) 11.2.0 Copyright (C) 2021 Free Software Foundation, Inc. This is free software; see the source for copying conditions. There is NO warranty; not even for MERCHANTABILITY or FITNESS FOR A PARTICULAR PURPOSE.
-
Compile a test program:
#include <stdio.h>
int main(){
	printf("Hello World\n");
}
Save the test program to
test.cand then rungcc test.cin the same shell and then run the executable by./a.exe.~ took 20s ❯ gcc test.c ~ took 8s ❯ ./a.exe Hello World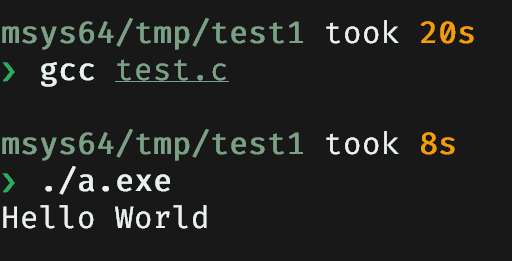

If everything works as expected then follow next steps. If something seems broken and doesn’t work, please ask in #help at MSYS2’s discord server.
Configuring Visual Studio Code
Open Visual Studio Code (VSCode). Typing Win + R and typing entering code should open it. Or you can open it by searching it in the start menu.
Install Extensions
Install the C/C++ extension for Visual Studio Code.
You can install the C/C++ extension by searching for ‘c++’ in the Extensions view Ctrl+Shift+X.
Creating a hello world project
Create a hello world project (or open a project you already have):
mkdir projects
cd projects
mkdir helloworld
cd helloworld
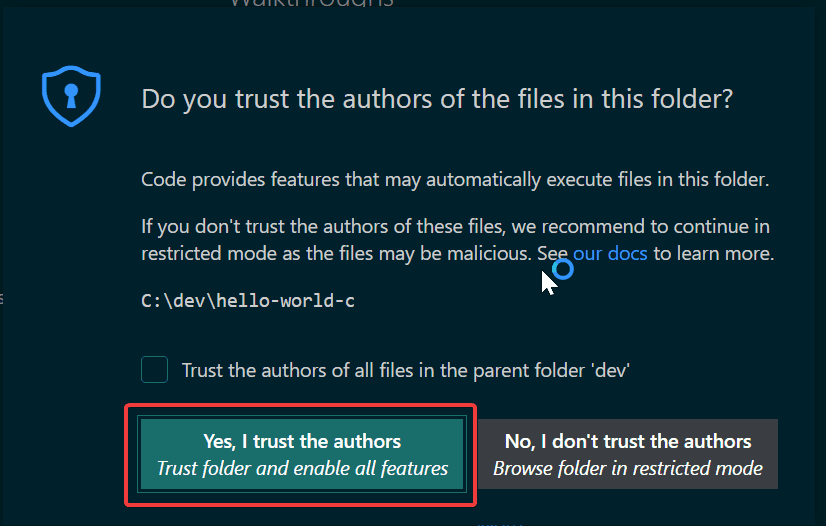
code .The “code .” command opens VS Code in the current working folder, which becomes your “workspace”. Accept the Workspace Trust dialog by selecting “Yes”, I trust the authors since this is a folder you created.
Also, create a file helloworld.c with the following “Hello World” code:
#include <stdio.h>
int main(){
	printf("Hello World");
}
Configuring Visual Studio Code to use GCC compiler
Open the Command Palette (Ctrl+Shift+P) and the select C/C++: Edit Configurations (UI). Change the Configuration name to GCC, set the Compiler path dropdown to the gcc compiler (C:/msys64/mingw64/bin/gcc.exe), and the IntelliSense mode to match the compiler (windows-gcc-x64).
The JSON file (.vscode/c_cpp_properties.json) in the end should look like this:
{
    "configurations": [
        {
            "name": "GCC",
            "includePath": [
                "${default}"
            ],
            "defines": [
                "_DEBUG",
                "UNICODE",
                "_UNICODE"
            ],
            "compilerPath": "C:/msys64/mingw64/bin/gcc.exe",
            "cStandard": "c17",
            "cppStandard": "c++17",
            "intelliSenseMode": "windows-gcc-x64"
        }
    ],
    "version": 4
}
This should enable Intellisense.
Configuring tasks.json
This file is used to tell VS Code how to build (compile) the program. This task will invoke the gcc compiler to create an executable file based on the source code.
From the main menu, choose Terminal > Configure Default Build Task. In the dropdown, which will display a tasks dropdown listing various predefined build tasks for C compilers. Choose gcc.exe build active file, which will build the file that is currently displayed (active) in the editor.

This will create a tasks.json file in a .vscode folder and open it in the editor, modify the file as required.
You can now build your source file by using Ctrl+Shift+B and run it by opening a terminal inside VSCode and runnning .\helloworld.exe.
Setting up Debugger
This steps will configure Visual Studio Code to use GDB debugger when you press F5 to debug the program.
- From the main menu, choose
Run > Add Configuration...and then chooseC++ (GDB/LLDB). - Click on “Add Configuration” and select “C/C++: (gdb) Launch”. The creates
launch.jsonand opens it. - Edit the file to change the key
miDebuggerPathto the actual executable of GDB (C:\\msys64\\mingw64\\bin\\gdb.exe). - Edit the file to change the key
programto${fileDirname}\\${fileBasenameNoExtension}.exe. - Again, edit the file to add the below code to the end, so that the file you edit is actually built before running the debugger.
"preLaunchTask": "C/C++: gcc.exe build active file"The launch.json looks like this in the end
{
    "version": "0.2.0",
    "configurations": [
        {
            "name": "(gdb) Launch",
            "type": "cppdbg",
            "request": "launch",
            "program": "${fileDirname}\\${fileBasenameNoExtension}.exe",
            "args": [],
            "stopAtEntry": false,
            "cwd": "${fileDirname}",
            "environment": [],
            "externalConsole": false,
            "MIMode": "gdb",
            "miDebuggerPath": "C:\\msys64\\mingw64\\bin\\gdb.exe",
            "setupCommands": [
                {
                    "description": "Enable pretty-printing for gdb",
                    "text": "-enable-pretty-printing",
                    "ignoreFailures": true
                },
                {
                    "description":  "Set Disassembly Flavor to Intel",
                    "text": "-gdb-set disassembly-flavor intel",
                    "ignoreFailures": true
                }
            ],
            "preLaunchTask": "C/C++: gcc.exe build active file"
        }
    ]
}
After this, you can have a look at Visual Studio Code’s docs on how to debug.
Hope this helps you in configuring Visual Studio Code for setting up a development environment for C. If you have an error, or found something to difficult to understand, jump over to #help on MSYS2’s Discord server.